

For any car enthusiast, achieving a professional-looking paint job at home can be a deeply satisfying achievement. But the journey to a mirror-like finish begins not with the first spray of paint, but with meticulously adjusting your automotive spray gun. So, how do you adjust your automotive spray gun for optimal performance?
Choose the Right Nozzle Size
Automotive spray guns come with interchangeable nozzles that control the width of the paint fan that is emitted. Most painters use a combination of nozzle sizes throughout the paint process. For broad, flat exterior surfaces on the car, a wider nozzle size like 1.3-1.5mm is preferred. For painting trim pieces, emblems, or getting into crevices, a smaller 0.8-1.0mm nozzle gives you better precision. Make sure to select the nozzle size appropriate for the area you are painting at that moment.
Understanding the Trio of Adjustments
Before diving into adjustments, let's familiarize ourselves with the key controls on your spray gun. Most models share three main knobs:
Fluid Control: This knob regulates the amount of paint flowing through the nozzle, directly impacting the thickness of the applied coat. Turning it clockwise increases paint flow, while counterclockwise reduces it.
Fan Control: This knob controls the width of the paint spray pattern. Turning it clockwise creates a narrower, more focused spray, while counterclockwise results in a wider, more feathered pattern.
Air Pressure Regulator: This knob governs the air pressure feeding the gun, influencing the atomization (breaking down) of the paint and the overall spray force. Higher pressure creates finer atomization and a more forceful spray, while lower pressure results in larger droplets and a softer spray.
Mastering these controls allows you to tailor the spray to your specific needs, ensuring the right amount of paint reaches the surface in a controlled manner.
1. Fluid Control: Finding the Sweet Spot
Imagine the fluid control knob as the paint's volume knob. Turning it clockwise opens the valve, allowing more paint to flow through the nozzle. Conversely, turning it counterclockwise restricts the flow. Finding the perfect setting is crucial. Too much paint leads to runs and drips, while too little results in a dry, patchy finish.
Start with the knob almost completely closed, then gradually open it while test-spraying onto a scrap panel. Aim for a wet, even coat without excessive buildup. Remember, you can always add more paint, but removing it is a much messier affair.
2. Fan Pattern: Shaping the Spray
A wider fan covers larger areas quickly, while a narrower fan offers greater precision for smaller details. Most guns allow for adjustments between a horizontal oval for broad coverage and a vertical oval for tight corners.
Experiment with different fan patterns on scrap panels to find what suits your project. For large, flat surfaces like hoods or doors, a wider fan is efficient. For intricate areas around headlights or bumpers, a narrower fan provides better control. Remember, a consistent fan pattern throughout the painting process is key to achieving a uniform finish.
3. Air Pressure: Finding the Power Balance
Air pressure acts as the engine of your spray gun, influencing both the atomization of the paint and the force of the spray. Too low pressure results in splatter and uneven application, while too high pressure can cause overspray and even peel the existing paint.
Lighter viscosity paints require less fluid flow while thicker paints call for higher fluid and air pressure settings, be sure to take viscosity into account when dialing in spray characteristics. The ideal pressure range for automotive painting typically falls between 10-25 PSI. To test, hold a piece of paper close to the nozzle while adjusting the pressure. The paper should flutter gently without tearing, indicating proper atomization and pressure.
Trigger Fully and Release Cleanly
The most common amateur spray painting mistake is "fluttering" the trigger. This happens when you only press it partially down and end up sputtering paint on rather than getting a full wide spray pattern. Always pull the trigger completely back in a smooth, steady motion. Also resist the urge to "wave" the gun back and forth. Pick a direction and move evenly. When finishing a stroke, release the trigger cleanly before stopping the motion to prevent drips. Proper trigger control takes practice but is essential.
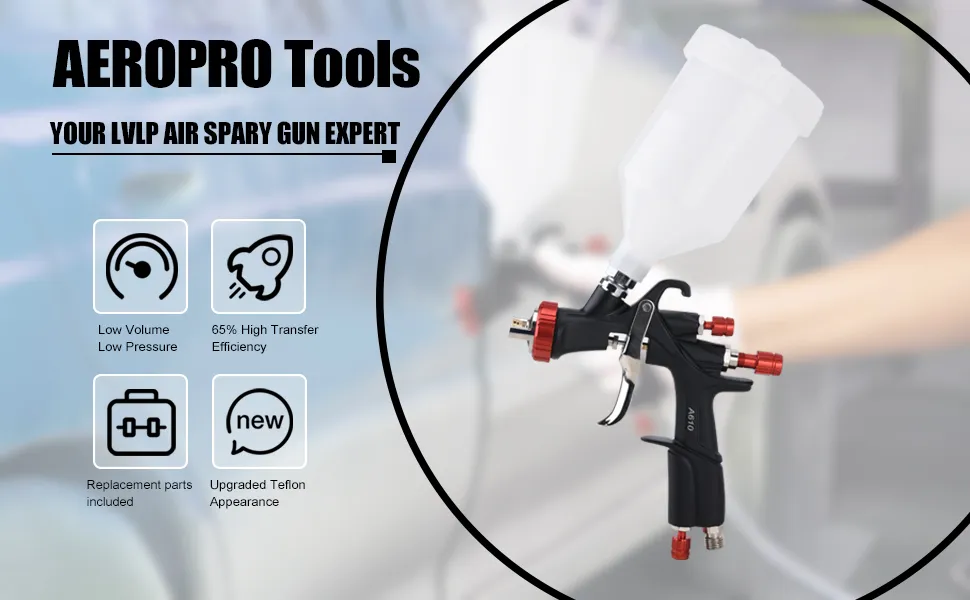
The AEROPRO A610 LVLP air spray gun enhances your painting experience with its premium adjustability, giving you satisfying precision and control on every project.
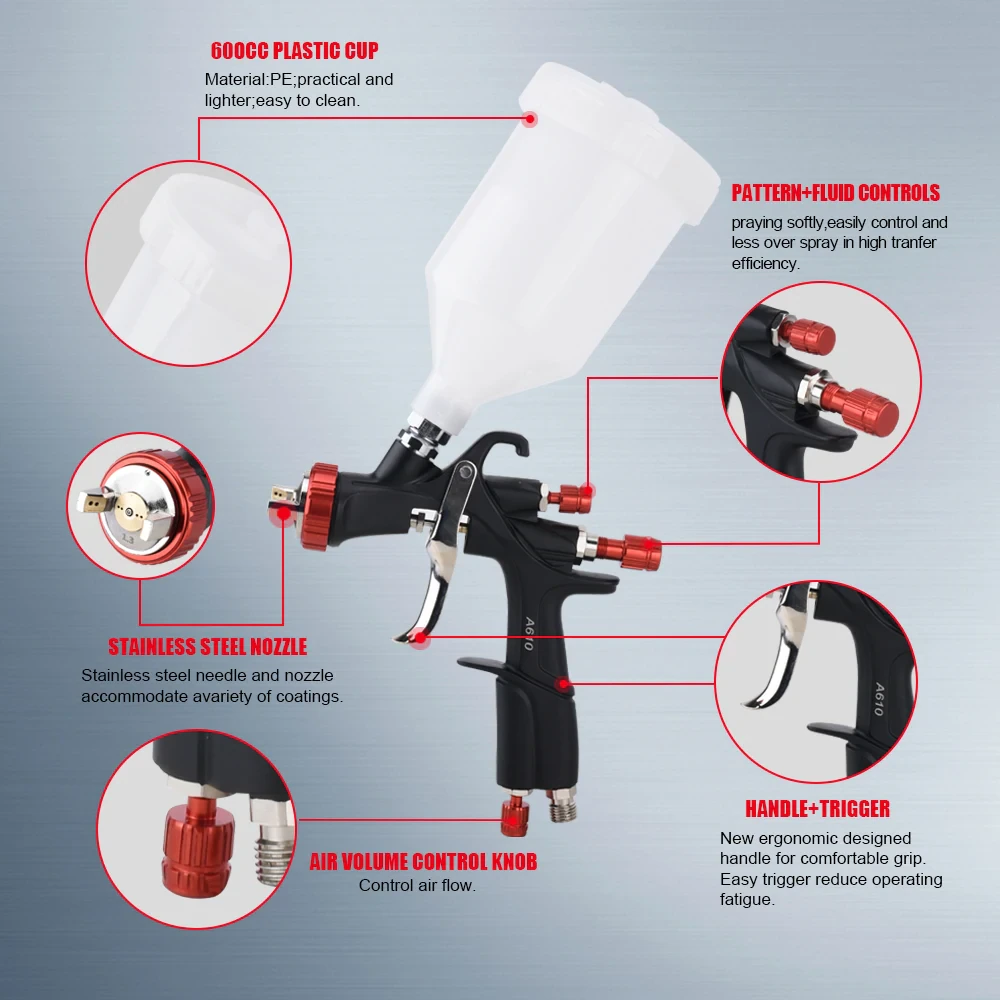
The desired pattern, volume of fluid output and fine atomization can easily be obtained by regulating the pattern adjusting knob, fluid adjusting knob and air adjusting knob. Precise adjustments minimize paint waste and overspray, This empowers you to achieve smooth, controlled spraying even at low pressure, perfect for delicate applications.
Suitable for automobile painting and refinish painting, carpentry, decorative painting, yacht and boat building. Suitable for water-based paint spraying.
Adapter Thread Size: Internal Thread M16x1.5
Feed Type:Gravity
Standard Nozzle:1.5mm
Optional Nozzle:1.3/1.4/1.5/1.7/2.0mm
Recommended Spraying Distance: 200mm
Recommended Air pressure:2.0-3.5bar(29-50psi)
Pattern Width:200-320mm
Air Inlet:1/4inch
Paint Capacity:600cc
Max.Temperature of the spray medium:50℃
Air consumption:3.0-3.9cfm 85.3-110.8L/min
AEROPRO has quickly risen to become an unrivaled global producer of air-powered devices including air tools, air spray gun, air nailer, airless paint sprayer, and etc.
AEROPRO seeks independent sales agent to represent and market our industry-leading pneumatic tools. We support OEM, ODM, OBM customization, small order quantity is acceptable and samples are available.
Make any cooperation possible. Any services related to the product, inquire with us now! Sales@Aeroprotools.Com